
Facebook launched its Facebook Places feature a few years back. The feature allows its users to share their ‘check-in’ at the places they are visiting to share their current location and the places they visit with their friends. This has an advantage because they can check in if any of their friends are also at the place, and they might catch up. Facebook is the most popular social networking site, with 3.03 billion monthly active users worldwide. Therefore, this feature has become popular and advantageous to businesses. This article explains how to claim a Facebook business page or places page.
Business houses maintain and manage their business name, Place address, contact information, business hours, profile picture, admins, and other settings with Facebook’s Places feature. In addition, they can advertise their business through Facebook Places. The customers can rate the business, check in, and like the Places page. The Places page also shows other businesses existing nearby, and that can include their competitors as well.
How to Locate, Claim, or Create your Facebook Place for your Business?
Anyone can create the Places page. Generally, customers create them when they don’t find a Facebook business page or want to check into that business location. When customers search for a business name and can’t find it, they can add a new Places page. This creates multiple Places pages for the same business, sometimes with variable names, addresses, and phone numbers. If the business has multiple branches and locations, it becomes troublesome since it has several Places pages for every location.
Challenges when claiming a Facebook business page
The Places pages are not under your control until and unless you claim them. Claiming a Places page has its own challenges for business owners:
- People comment and rate the business without the owner’s knowledge.
- The Places page always pops up the nearby businesses, which include their direct competitors.
- People often like to check the unclaimed Places pages. The analytics of the business pages have information about the people who went through their claimed Places pages. Unfortunately, the business can’t communicate with the audiences who visit their unclaimed pages in any way. So, it’s a lost opportunity to communicate with customers (or potential customers) who have already liked their page.
The business owners or the store managers should claim their Facebook Places page for their business. This way, they get admin access to the Places page and automatically convert it into the business page, which is then controlled by the business. All restaurant businesses should claim all the Facebook Places pages created for their business to gain control of all the pages representing their business. This step helps them consolidate their Facebook presence, correct incorrect details, and forbid other pages from intruding into the likes, reviews, and check-ins they were getting otherwise.
How to Locate a Page on Facebook Places?
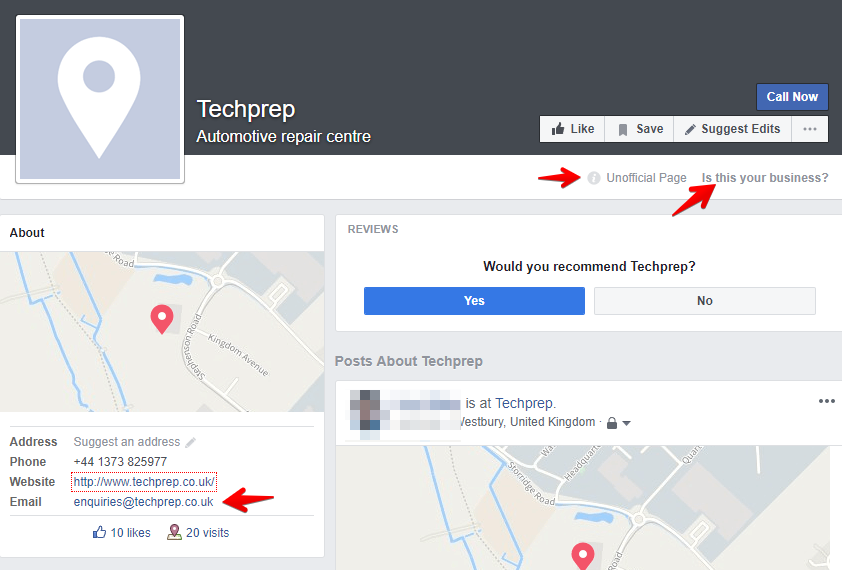
First, you must log in to your Facebook account (not through the phone), then search for your business type and the business name in the usual Facebook search box. If the business’s Places page already exists, click on it. You should know that your business’s Fan Page differs from the Places page. Look for the search result that gives information about the place’s number of ‘check-ins’.
Didn’t find the unofficial Facebook page for my business?
If you do not find the Places page, check into the business on your smartphone. Once you complete a check-in into the page, there is a status update on the Facebook profile page that marks where you checked in and the link to the Facebook Places page of your business. No problem if you do not find your Facebook Places page. Many businesses do not have a Facebook Places page yet. So, if you still can’t find your Places page, move to the ‘Creating a new Facebook Place’ option.
How to Claim a Facebook Places Page for Your Business?
Facebook changed its verification process. Now, you must have the company email address on your personal Facebook account, or you can provide a scanned document of a utility or phone bill that includes the business’s name and address. After claiming the existing page, the Places page transforms into a business page, giving you admin access. Then, this page can be merged with the business’s existing page. There, you’ll also learn how to merge Facebook business pages.
The following steps are to claim a Facebook Places page:
Step 1- Keep Business Email address or documents
First, add a business email address to your personal profile example owner@abcstore.com. This is the easiest method to verify that you’re representing the business. It is not required as your primary email address; it will just be a part of your personal Facebook profile. You can upload a document showing the business name and address if you don’t have the business email address. It can be a utility bill, business license, tax file, certificate of formation, memorandum of association, articles of association, or incorporation. Facebook accepts JPG, PNG, PDF, and DOC files.
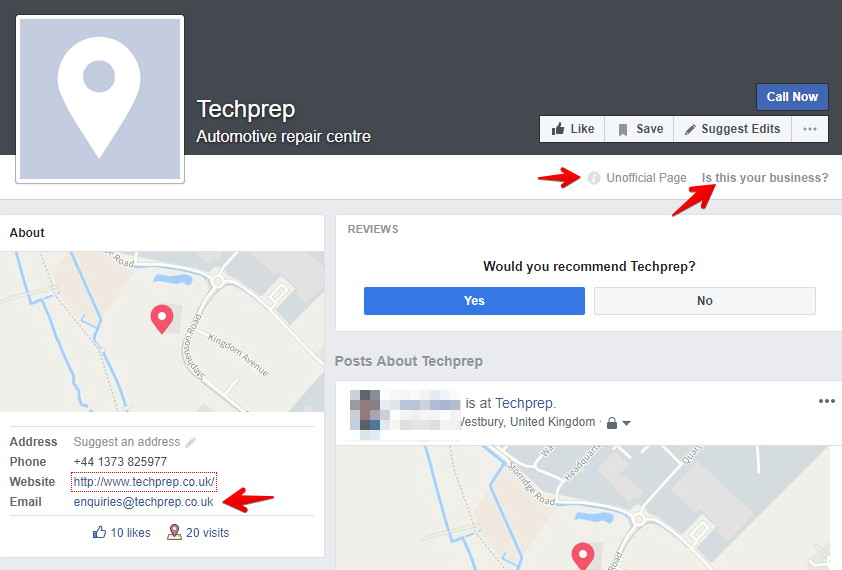
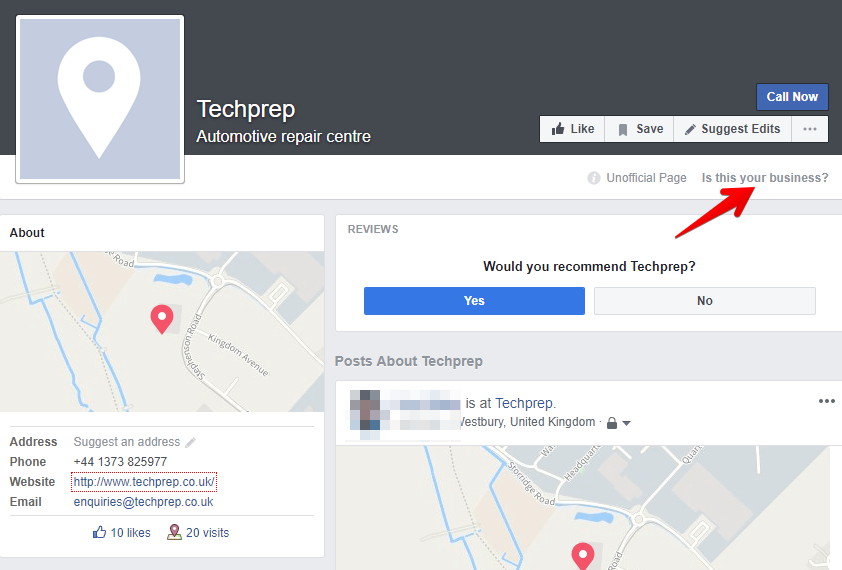
Step 2- Click the link – Is this your business?
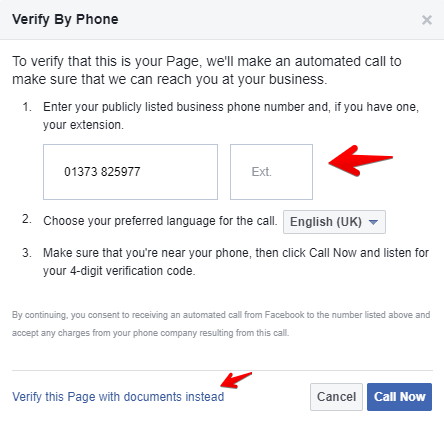
If you find your business’s Facebook Place, click on it to visit the page. Then click the link at the bottom left of the page, “Is this your business?”. The link directs us to Facebook’s “claiming flow.” The procedure is similar to other claiming processes where you need to do a phone verification to validate that you are the official representative of the physical place of your business. However, it differs from other claiming processes where you require supplying ‘official’ documentation such as a certificate of formation, local business license, better business bureau accreditation, etc., to prove your credibility.
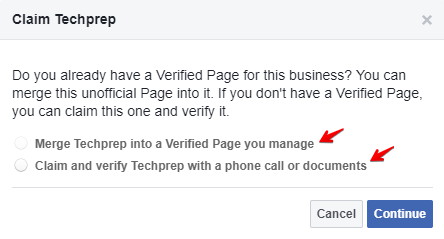
Step 3- Merge to an existing page or claim with a phone call or documents
A pop window opens and guides through the claiming process. It may ask whether you want to “merge to another verified page” or if you want to “claim” it. If you only want to “claim” it, you’ll get a popup asking you to click the “I am an official representative” checkbox and continue the claiming process.
Step 4- Complete your business details.
Fill in the details regarding your business. Facebook asks you to provide the following information:
- The official name of the business
- Business address
- Business phone number
- Business website
- Third-party listing (like Business Bureau listing, e.g., Yelp)
- Relationship with the location (whether you’re an owner)
- The business name and address should be similar to the Places page you want to claim. The required fields are name, address, and job title.
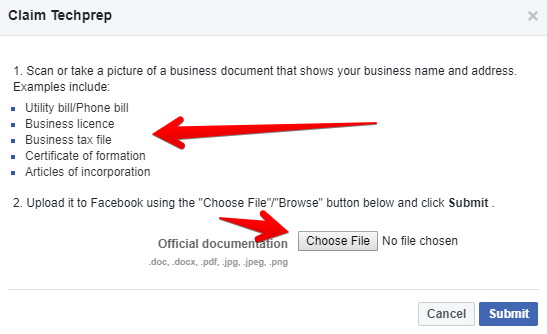
Step 5- Prove you represent the business.
At last, to complete the claiming process, you need to prove that you’re the official representative of the business page you’re trying to claim. If you’ve added the business email with the personal Facebook profile, select it from the drop-down menu. If you don’t have a business address, you’ll need to upload a document showing the company name and address. The logos, business cards, and website screenshots are not accepted.
After clicking the “Submit” button, a popup window appears stating that they have received your email request and will inform you once they are done processing it. Unfortunately, it takes almost a week for Facebook to respond.
Here is the answer to how to merge Facebook business pages.
Once you complete the process, Facebook sends you an email letting you know that the Places page has been converted to a business page. You are now the page admin. The previous likes, reviews, and check-ins are transferred to the new page.
If there are multiple business pages, you can merge them into one. Merging is beneficial since it helps retain everything from your business pages, such as photos, posts, events, videos, and ads. It also adds a map, check-ins, and a place on the Page Timeline for recommendations.
How to Create a Facebook Places Page for Your Business?
- Firstly, you must be physically present with a smartphone at your business.
- Then, download the latest Facebook app for your smartphone. If the apps don’t work, point the browser to http://touch.facebook.com.
- Now, try to check in at your place of business.
- If you do not find the Facebook Places page while locating it in the given section, click the “Add” button to the left of the Places search box; otherwise, click on the “+” in the upper right corner.
- You must enter the name of your Facebook Places page and an optional description.
- Then, click on the “Add” button.
- Click the “Check-In” button to share your visits.
- After creating the Places page, search for it on Facebook’s desktop. Then follow the “Is this your business?” link to begin a Facebook Place claiming process.
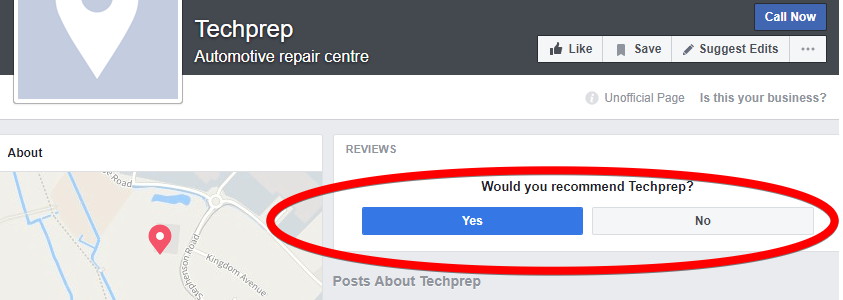
While creating a Facebook Places page or merging a Facebook Places page, there is the option to add a button that recommends the page. It appears on the page’s right sidebar for users who live near that business. This feature presents an excellent opportunity for the business. It allows users to write recommendations for the business, which appear in the News Feed and show when they visit the page. Last, everyone must understand and follow their privacy settings concerning Facebook Places.
HELP! These buttons are not showing up on my location page, and getting actual support from Facebook is impossible! So how can I claim my location page without these buttons?
You may hire a local social media marketing company, and they will do it for you.